如何在 Outlook 中建立資料夾,以便整理包含特定人員的電子郵件?
收件匣雜亂不堪?本教學將介紹三種方法,協助您在 Outlook 中輕鬆整理特定人員的電子郵件,大幅提升工作效率!
一律將包含特定人員的電子郵件移至已建立的資料夾
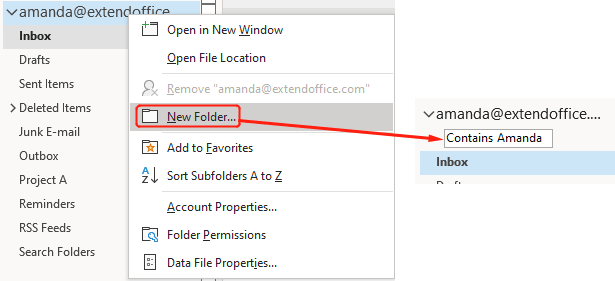
1. 在您要建立資料夾以整理電子郵件的帳戶上按一下滑鼠右鍵,從快捷選單中選擇「新增資料夾」並為其命名。
2. 在您的收件匣或已傳送郵件資料夾中,選取一封包含特定郵箱地址的電子郵件,該地址的所有郵件您希望移至新資料夾。
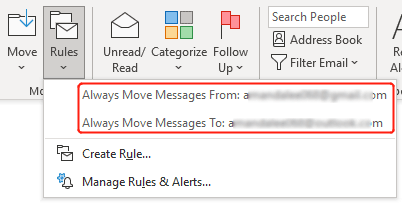
3. 在「首頁」索引標籤的「移動」群組中,依需求點選「規則」>「一律移動來自:特定郵箱地址的郵件」和/或「規則」>「一律移動寄至:特定郵箱地址的郵件」。
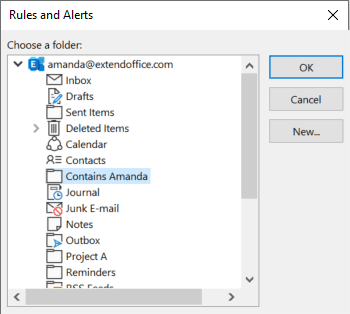
4. 在彈出的「規則與警示」對話方塊中,指定郵件要移至的資料夾,然後按一下「確定」。
5. 符合條件的收件匣或已傳送郵件資料夾中的電子郵件,現已移至您剛剛建立的資料夾;未來符合條件的郵件也會直接進入該資料夾。
建立搜尋資料夾以自動為特定人員整理電子郵件
若您不想將郵件移至資料夾,僅希望更方便地檢視,可在 Outlook 中建立「搜尋資料夾」。此功能能幫您跨多個資料夾找出符合指定條件的電子郵件,同時保留郵件於原始位置。
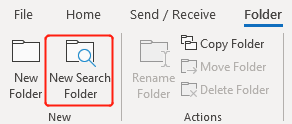
1. 在「資料夾」索引標籤的「新增」群組中,點選「新增搜尋資料夾」。
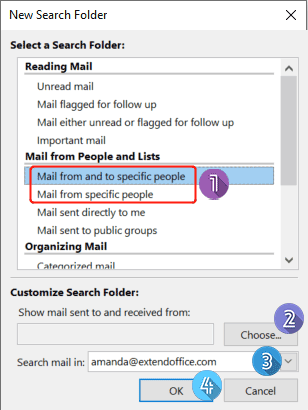
- 1) 在「選取搜尋資料夾」方塊中,於「來自人員與清單的郵件」清單內,依需求選擇「來自及寄給特定人員的郵件」或「來自特定人員的郵件」。
- 2) 在「自訂搜尋資料夾」方塊中,點選「選擇」,從您的地址清單中挑選人員。
- 3) 指定要從哪個電子郵件帳戶搜尋郵件。
- 4) 按一下「確定」。
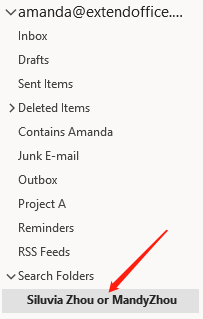
3. 符合條件的電子郵件訊息將自動建立為搜尋資料夾,並置於「搜尋資料夾」之下。
使用 VBA 批次為所有電子郵件帳戶建立資料夾以整理電子郵件
若您在 Outlook 中擁有多个电子邮件账户,并希望为每个账户批量建立资料夹,以整理特定人员的邮件,可使用 VBA 方法,将包含该特定人员的邮件从各账户的收件匣或寄件备份资料夹中移出。请依下列步骤操作。
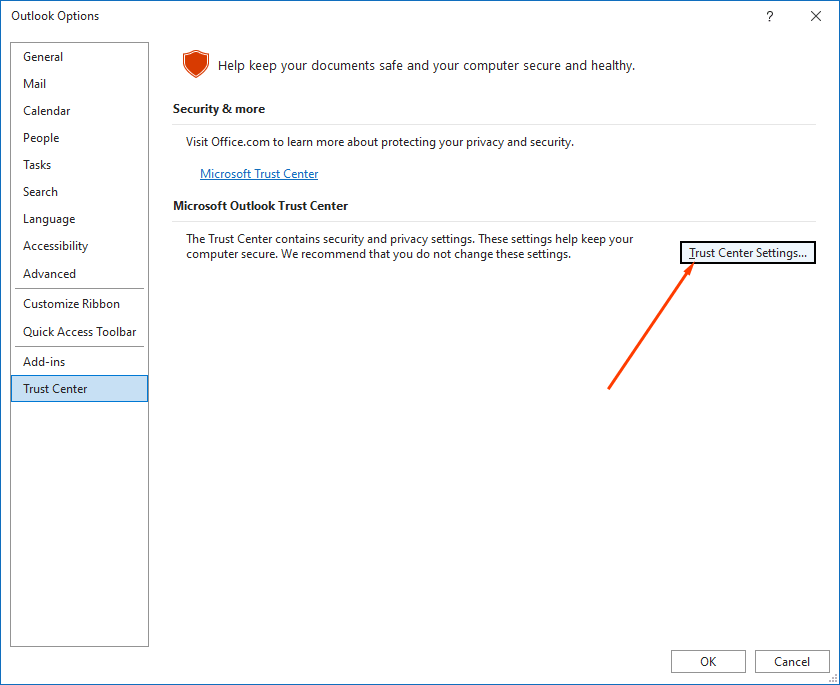
1. 在 Outlook 中,依次點選「檔案」>「選項」>「信任中心」,然後點選「信任中心設定」。
2. 在彈出的對話方塊中,切換至「巨集設定」,選取「啟用所有巨集」,並勾選「將巨集安全性設定套用至已安裝的增益集」。
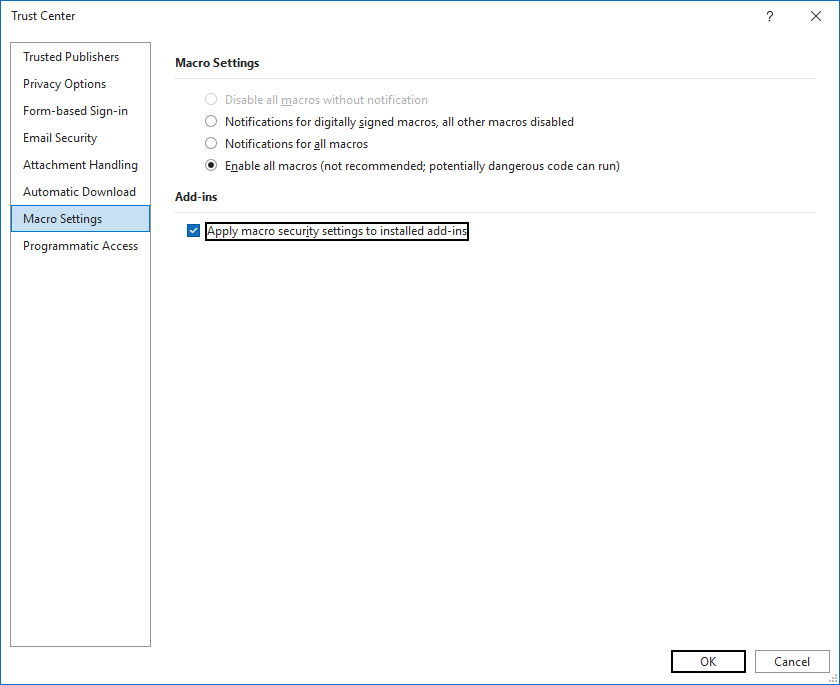
3. 按一下「確定」即可關閉所有對話方塊。
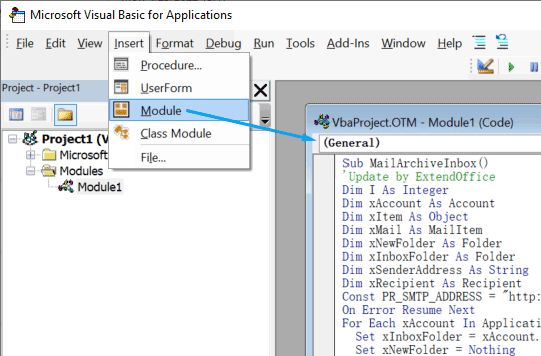
4. 按下「Alt」+「F11」鍵,即可開啟 Microsoft Visual Basic for Applications 視窗。
5. 按一下「插入」>「模組」,然後將下列任一 VBA 程式碼複製到模組視窗中。
VBA 程式碼 1:批次建立資料夾,以在所有帳戶的收件匣中整理包含特定寄件者的電子郵件
Sub MailArchiveSenderInInbox()
'Update by ExtendOffice
Dim I As Integer
Dim xAccount As Account
Dim xItem As Object
Dim xMail As MailItem
Dim xNewFolder As Folder
Dim xInboxFolder As Folder
Dim xSenderAddress As String
Dim xRecipient As Recipient
Dim xFolderName As String
xFolderName = "NewFolder" 'Replace "NewFolder" with desired folder name
Const PR_SMTP_ADDRESS = "http://schemas.microsoft.com/mapi/proptag/0x39FE001E"
On Error Resume Next
For Each xAccount In Application.Session.Accounts
  Set xInboxFolder = xAccount.DeliveryStore.GetDefaultFolder(olFolderInbox)
  Set xNewFolder = Nothing
  Set xNewFolder = xAccount.DeliveryStore.GetRootFolder.Folders(xFolderName)
  If xNewFolder Is Nothing Then
    Set xNewFolder = xAccount.DeliveryStore.GetRootFolder.Folders.Add(xFolderName)
  End If
  For I = xInboxFolder.Items.Count To 1 Step -1
    Set xItem = xInboxFolder.Items.Item(I)
    If xItem.Class = olMail Then
      Set xMail = xItem
      xSenderAddress = ""
      If xMail.Sender.Type = "EX" Then
        xSenderAddress = xMail.Sender.PropertyAccessor.GetProperty(PR_SMTP_ADDRESS)
      Else
        xSenderAddress = xMail.SenderEmailAddress
      End If
      If xSenderAddress = "" Then
        xSenderAddress = xMail.SenderEmailAddress
      End If
      If VBA.InStr(xSenderAddress, "name@example.com") <> 0 Then
        xMail.Move xNewFolder
      End If
    End If
  Next
  If xNewFolder.Items.Count = 0 Then
    xNewFolder.Delete
    xAccount.DeliveryStore.GetDefaultFolder(olFolderDeletedItems).Folders(xFolderName).Delete
  End If
Next
Set xInboxFolder = Nothing
Set xNewFolder = Nothing
End Sub
注意:請根據上方 VBA 程式碼第 12、16 與 35 列中的註解,替換相對應的程式片段。
VBA 程式碼 2:批次建立資料夾,以在所有帳戶的收件匣中整理包含特定收件者的電子郵件
Sub MailArchiveRecipientInInbox()
'Update by ExtendOffice
Dim I As Integer
Dim xAccount As Account
Dim xItem As Object
Dim xMail As MailItem
Dim xNewFolder As Folder
Dim xInboxFolder As Folder
Dim xSenderAddress As String
Dim xRecipient As Recipient
Dim xFolderName As String
xFolderName = "NewFolder"
Const PR_SMTP_ADDRESS = "http://schemas.microsoft.com/mapi/proptag/0x39FE001E"
On Error Resume Next
For Each xAccount In Application.Session.Accounts
  Set xInboxFolder = xAccount.DeliveryStore.GetDefaultFolder(olFolderSentMail)
  Set xNewFolder = Nothing
  Set xNewFolder = xAccount.DeliveryStore.GetRootFolder.Folders(xFolderName)
  If xNewFolder Is Nothing Then
    Set xNewFolder = xAccount.DeliveryStore.GetRootFolder.Folders.Add(xFolderName)
  End If
  For I = xInboxFolder.Items.Count To 1 Step -1
    Set xItem = xInboxFolder.Items.Item(I)
    If xItem.Class = olMail Then
      Set xMail = xItem
      xSenderAddress = ""
      For Each xRecipient In xMail.Recipients
'        If xRecipient.Type = olCC Then
            xSenderAddress = xSenderAddress & ", " & xRecipient.PropertyAccessor.GetProperty(PR_SMTP_ADDRESS)
            If xSenderAddress = "" Then
              xSenderAddress = xSenderAddress & ", " & xRecipient.Address
            End If
'        End If
      Next
      If VBA.InStr(xSenderAddress, "name@example.com") <> 0 Then
        xMail.Move xNewFolder
      End If
    End If
  Next
  If xNewFolder.Items.Count = 0 Then
    xNewFolder.Delete
    xAccount.DeliveryStore.GetDefaultFolder(olFolderDeletedItems).Folders(xFolderName).Delete
  End If
Next
Set xInboxFolder = Nothing
Set xNewFolder = Nothing
End Sub
注意:
- 1) 請根據上方 VBA 程式碼第 12、16 與 35 列的註解,替換相對應的程式片段。
- 2) 若要封存包含特定副本(CC) 或密件副本(BCC) 收件人的訊息,請刪除第 28 與 33 列開頭的單引號(‘),以取消註解。
6. 按下「F5」執行 VBA 程式碼,若存在符合條件的郵件,系統將自動建立新資料夾。
相關文章
如何在多個 Outlook 資料檔案(PST)或電子郵件帳戶中建立搜尋資料夾?
眾所周知,Outlook 的搜尋資料夾僅限於在目前郵件匣範圍內搜尋電子郵件。不過,Outlook 本身支援跨所有信箱的搜尋功能。因此,您可以嘗試以下替代方法,在 Outlook 中為多個電子郵件帳戶建立搜尋資料夾。
在 Outlook 的一般 POP 3 電子郵件帳戶中,根據指定寄件者或寄件人郵箱網域建立搜尋資料夾相當簡單。然而,此方法並不適用於 Exchange 帳戶。本文將示範如何建立搜尋資料夾,以顯示 Exchange 帳戶中所有來自內部寄件者的電子郵件。
如何在 Outlook 中依指定的色彩類別對電子郵件進行分組?
有時您會為電子郵件訊息標記特定的顏色類別,以便輕鬆套用規則、快速找出這些郵件,或用於其他用途。然而,當大量郵件集中在同一資料夾時,很難一眼辨識出哪些郵件已標記指定的顏色類別。其實,Microsoft Outlook 提供了多種實用技巧,能讓您快速依指定顏色類別對電子郵件進行分組。
如何在 Outlook 中建立資料夾,並依日期範圍整理電子郵件?
本教學將介紹兩種方法,協助您在 Outlook 中依日期範圍整理資料夾內的電子郵件,大幅提升工作效率。
最佳 Office 生產力工具
體驗全新 Kutools for Outlook,內含 100+ 項超強功能!立即點擊下載!
🤖KUTOOLS AI:運用先進 AI 技術,輕鬆處理電子郵件——無論是回覆、摘要、優化、擴充、翻譯還是撰寫郵件,通通一鍵搞定!
📧 郵件自動化:自動答覆(支援 POP 與 IMAP)/預約寄送郵件/寄信時依規則自動抄送密送/自動轉發(高級規則)/自動加入問候語/自動將多收件人郵件拆分為個別訊息……
📨 郵件管理:撤回郵件/依主旨等條件封鎖詐騙郵件/刪除重複郵件/高級搜尋/整合文件夾……
📁 附件專業版:批次儲存/批次解除附加/批次壓縮/自動保存/自動拆離/自動壓縮……
🌟 介面魔法:😊更多精美酷炫表情符號/重要郵件來到時提醒您/最小化 Outlook 而非關閉……
👍 一鍵奇蹟:帶附件全部答復/防釣魚郵件/🕘顯示發送者當前時間時區……
👩🏼🤝👩🏻 聯絡人與行事曆:從選取的郵件中批次新增聯絡人/將聯繫人組拆分為個別群組/移除生日提醒……
用您的慣用語言暢享 Kutools — 完整支援英文、西班牙文、德文、法文、中文等 40 多種語言!
立即一鍵解鎖 Kutools for Outlook!別再等待,馬上下載,全面提升工作效率!


🚀 一鍵下載 — 立即取得所有 Office 增益集
強烈推薦:Kutools for Office(5 合 1)
一鍵下載五個安裝程式,一次完成 — Kutools for Excel、Outlook、Word、PowerPoint 與 Office Tab Pro!立即點擊下載!
- ✅ 一鍵便利:只需一次操作,即可下載全部五個安裝套件!
- 🚀 隨時應對任何 Office 任務:按需安裝所需增益集,立即提升工作效率!
- 🧰 包含:Kutools for Excel/Kutools for Outlook/Kutools for Word/Office Tab Pro/Kutools for PowerPoint