如何在 Outlook 中將導航欄從左側移動到底部?
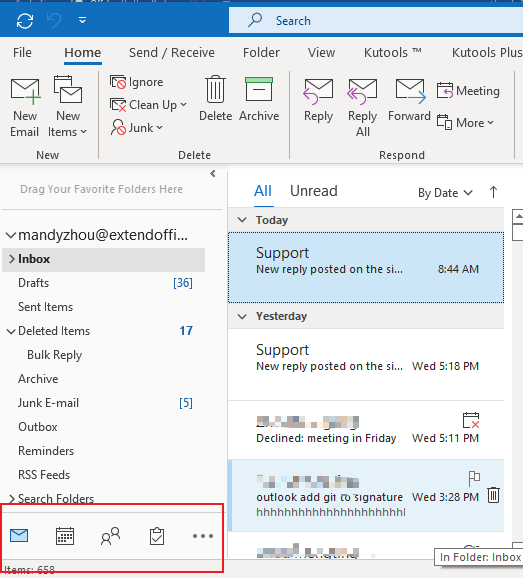
對於某些 Microsoft 365 的 Outlook 使用者,您可能會發現導航欄不再位於底部。相反,導航欄被移到了 Outlook 窗口的左上方。有些人可能認為這是一個很好的更新,但很多人對這個改變感到困擾,因為他們已經習慣了舊的樣式,而這個改變帶來了各種不便。那麼,有沒有辦法將導航欄從左側移動到底部呢?答案是肯定的。本教程將向您展示兩種簡單快速的方法來完成這個操作。
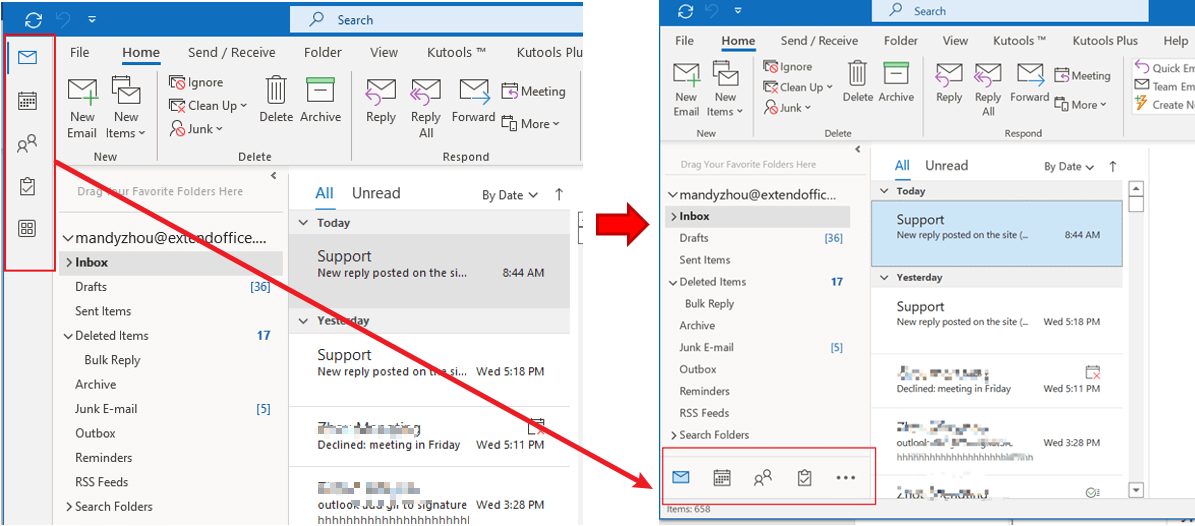
注意:這裡以 Microsoft Outlook 365 為例,其他 Outlook 版本的步驟和描述可能會有所不同。
使用 Outlook 選項將導航欄從側邊移動到底部(強烈推薦 👍)
對於最新版本的 Outlook(即 Microsoft 365)使用者,您可以非常快速地完成這個操作。Office 剛剛在最新版本的 Outlook 365 中添加了一個選項。感謝這次更新,只需幾次點擊,您就可以將導航欄改回底部。請按照以下步驟進行操作:
1. 啟用 Outlook。點擊「檔案」>「選項」>「進階」。
2. 取消勾選「Outlook 窗格」下的「在 Outlook 中顯示應用程式」選項。
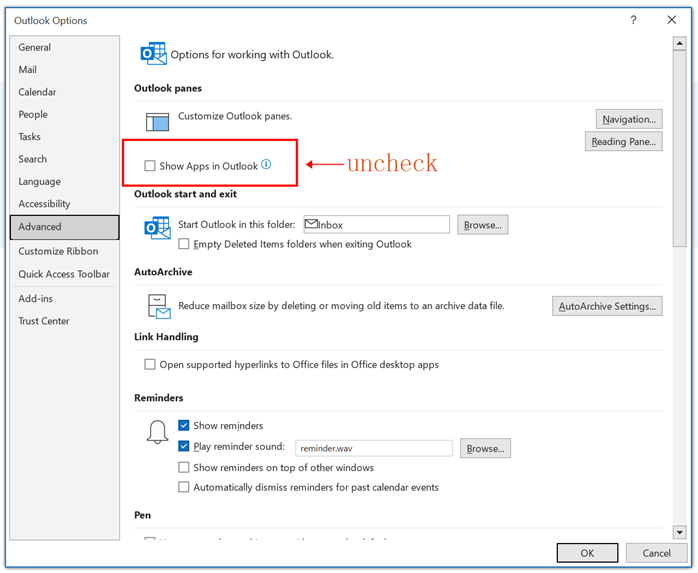
3. 點擊「確定」按鈕完成設置。
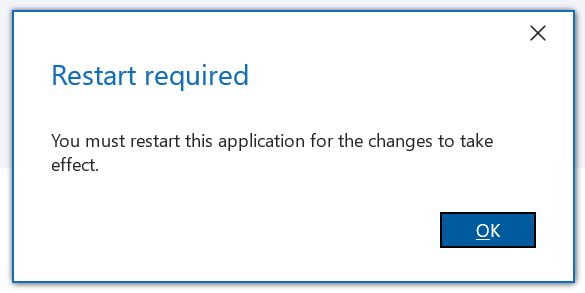
4. 彈出一個「提示框」,提醒您必須重新啟動此應用程式才能使更改生效。點擊「確定」。
4. 重新啟動 Outlook。您會發現導航欄已經移回底部。
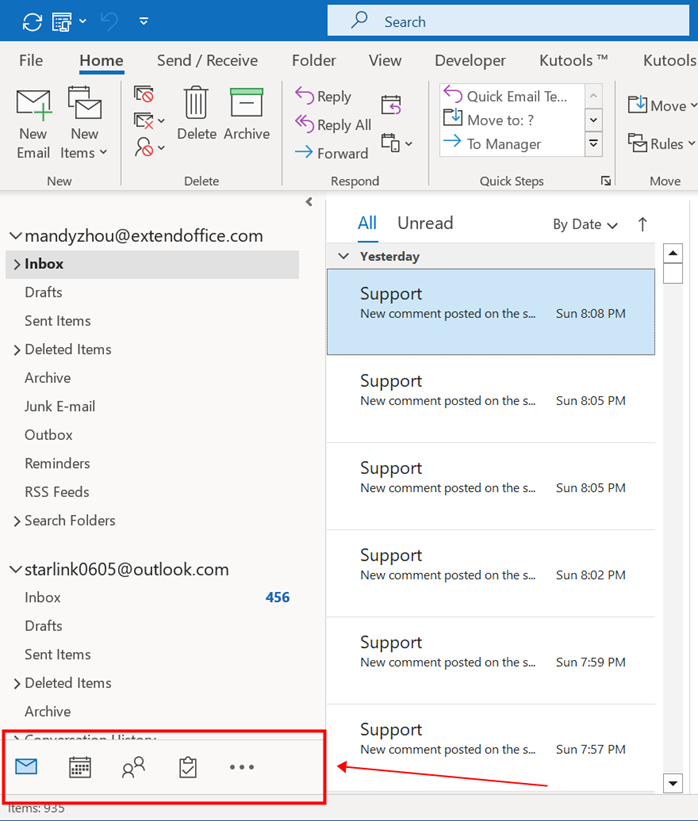
我最近才知道這個方法(2022 年 12 月 14 日),它真的讓我驚訝,因為它太簡單了。每個人都應該嘗試這個方法!
Outlook中的AI郵件助理:更聰明的回覆,更清晰的溝通(一鍵奇蹟!) 免費
使用Kutools for Outlook的AI郵件助理簡化您的日常Outlook任務。這個強大的工具會從您過去的郵件中學習,提供智能且準確的答覆,優化您的郵件內容,並幫助您輕鬆起草和潤色郵件。

此功能支援:
- 智能回覆:根據您過去的對話獲得量身定制、精確且隨時可用的回覆。
- 增強內容:自動優化您的郵件文字以提高清晰度和影響力。
- 輕鬆撰寫:只需提供關鍵字,讓AI處理其餘部分,並有多種寫作風格可供選擇。
- 智能擴展:通過上下文感知建議來拓展您的思路。
- 摘要生成:即時獲取長郵件的簡潔概述。
- 全球觸及:輕鬆將您的郵件翻譯成任何語言。
此功能支援:
- 智能郵件回覆
- 優化的內容
- 基於關鍵字的草稿
- 智能內容擴展
- 郵件摘要生成
- 多語言翻譯
最重要的是,此功能永遠完全免費!不要再等待了——立即下載AI郵件助理並享受吧
使用登錄檔修復將導航欄從側邊移動到底部(有效但複雜)
1. 啟用 Outlook,您可以看到「導航欄」現在位於左上角。
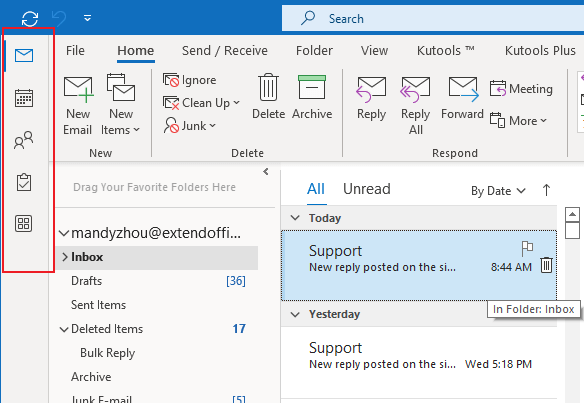
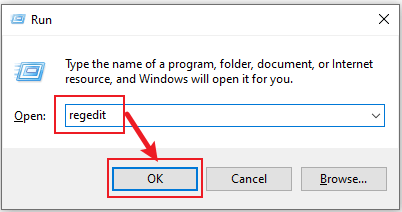
2. 按住鍵盤上的「Windows 鍵」和「R」鍵打開「執行」對話框。在「打開」框中輸入「regedit」,然後點擊「確定」。
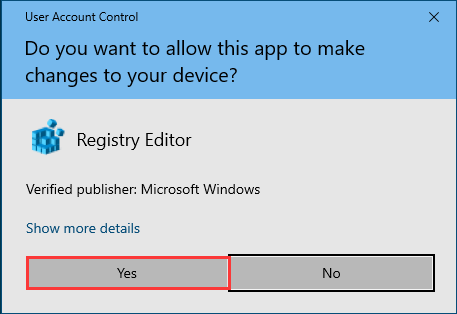
3. 然後彈出一個「用戶帳戶控制」對話框。點擊「是」按鈕繼續。
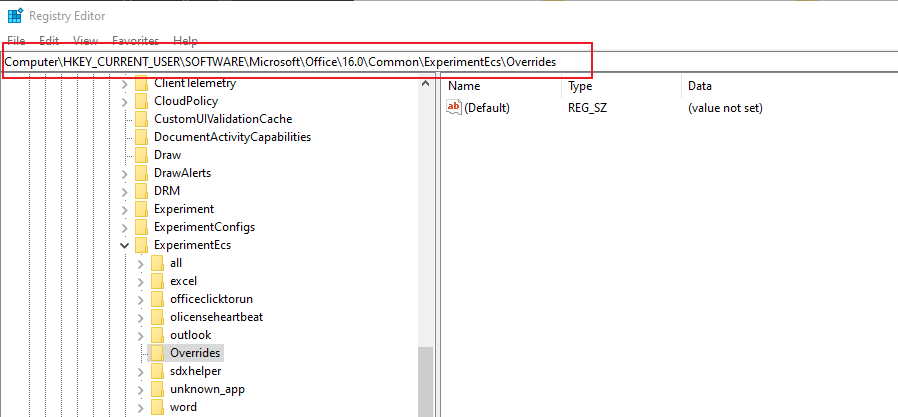
4. 在「登錄編輯器」窗口中,導航到以下路徑:"HKEY_CURRENT_USER\SOFTWARE\Microsoft\Office\16.0\Common\ExperimentEcs\Overrides"。
5. 找到並點擊頁面右側「名稱」列中的“Microsoft.Office.Outlook.Hub.HubBar”字符串值。然後將「數值數據」設置為“false”。
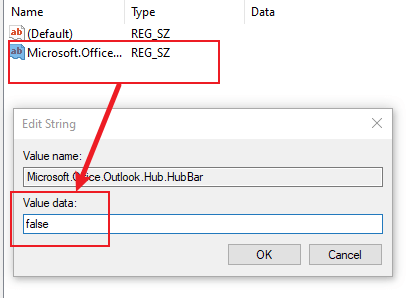
但在我這種情況下,該註冊表鍵中不存在“Microsoft.Office.Outlook.Hub.HubBar”字符串值。因此,我應該先在此位置創建一個名為“Microsoft.Office.Outlook.Hub.HubBar”的新字符串值。
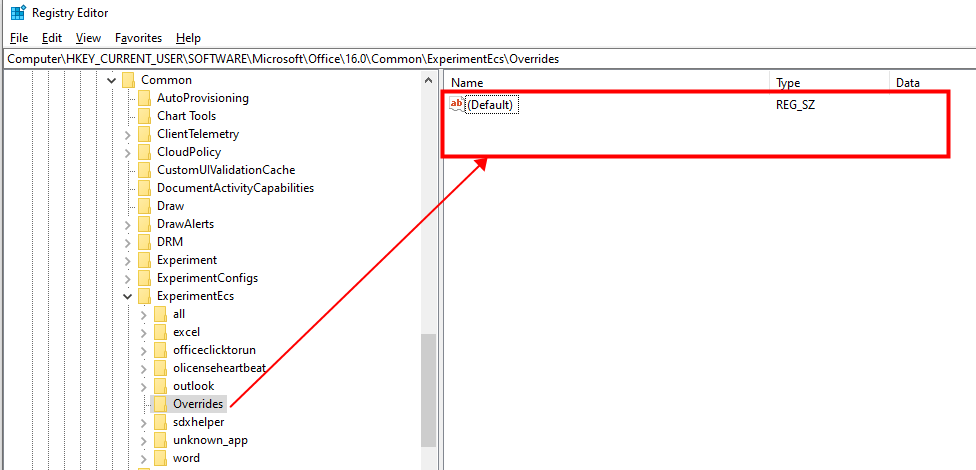
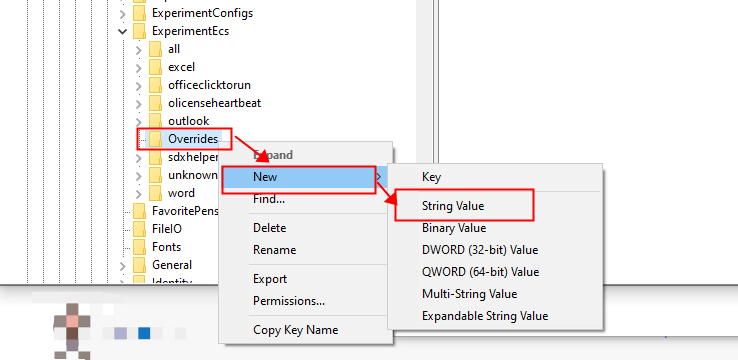
6. 要創建“Microsoft.Office.Outlook.Hub.HubBar”字符串值,請右鍵單擊“Overrides”文件夾,然後在彈出的菜單列表中點擊“新建”>“字符串值”。
7. 在文本框中複製並粘貼“Microsoft.Office.Outlook.Hub.HubBar”。
提示:如果字符串值的名稱不可編輯,請右鍵單擊它並從上下文菜單中選擇「重命名」。


8. 雙擊新創建的字符串值。彈出「編輯字符串」對話框。在「數值數據」框中輸入“false”。然後點擊「確定」。
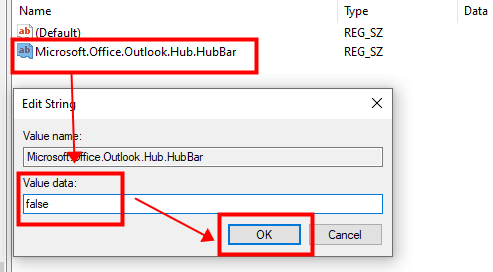
現在「重新啟動 Outlook」。您將看到「導航欄回到了 Outlook 頁面的底部」,就像以前一樣。
注意:如果您想恢復左側導航欄設置,只需在「註冊表編輯器」窗口中找到“Microsoft.Office.Outlook.Hub.HubBar”字符串值,右鍵單擊它,然後點擊「刪除」。

相關文章
如何將快速部件添加到快速訪問工具欄並在 Outlook 中使用它?
將快速部件添加到快速訪問工具欄可以幫助您實現目標。在本教程中,我們將討論將快速部件添加到快速訪問工具欄並使用它的方法。
如何在 Outlook 中重命名和編輯快速部件條目?
我們應該如何重命名和編輯現有的快速部件條目?本教程將向您展示實現這一技巧的方法。
如何在 Outlook 中修改或刪除多個快速部件和自動圖文集?
那麼我們應該如何快速修改或刪除它們?本教程將向您展示完成此操作的方法。
最佳辦公室生產力工具
最新消息:Kutools for Outlook 推出免費版本!
體驗全新 Kutools for Outlook,超過100項精彩功能!立即下載!
🤖 Kutools AI :採用先進的AI技術輕鬆處理郵件,包括答覆、摘要、優化、擴充、翻譯及撰寫郵件。
📧 郵件自動化:自動回覆(支援POP及IMAP) / 排程發送郵件 / 發送郵件時根據規則自動抄送密送 / 自動轉發(高級規則) / 自動添加問候語 / 自動分割多收件人郵件為個別郵件 ...
📨 郵件管理:撤回郵件 / 根據主題等方式阻止詐騙郵件 / 刪除重複郵件 / 高級搜索 / 整合文件夾 ...
📁 附件專業工具:批量保存 / 批量拆離 / 批量壓縮 / 自動保存 / 自動拆離 / 自動壓縮 ...
🌟 介面魔法:😊更多精美與酷炫表情符號 /重要郵件來臨時提醒 / 最小化 Outlook 而非關閉 ...
👍 一鍵便利:帶附件全部答復 / 防詐騙郵件 / 🕘顯示發件人時區 ...
👩🏼🤝👩🏻 聯絡人與日曆:從選中郵件批量添加聯絡人 / 分割聯絡人組為個別組 / 移除生日提醒 ...
以您偏好的語言使用 Kutools,支援英語、西班牙語、德語、法語、中文及超過40種其他語言!
只需點擊一次,即可立即解鎖 Kutools for Outlook。別等了,現在下載提升您的工作效率!


🚀 一鍵下載 — 獲取全部 Office 插件
強力推薦:Kutools for Office(5合1)
一鍵下載五個安裝程式,包括 Kutools for Excel, Outlook, Word, PowerPoint及 Office Tab Pro。 立即下載!
- ✅ 一鍵便利:一次操作即可下載全部五套安裝包。
- 🚀 隨時處理任何 Office 任務:安裝您需求的插件,隨時隨地。
- 🧰 包含:Kutools for Excel / Kutools for Outlook / Kutools for Word / Office Tab Pro / Kutools for PowerPoint